A clogged window AC drain line is usually a quick fix. Turn the unit off and unplug it, find the small drain hole on the rear underside, work a stiff wire or pipe cleaner through it to break up the gunk, suck the debris out with a wet/dry shop vacuum, then flush it with a vinegar-and-warm-water mix and pour a little water through the pan to confirm it flows. Most of the time that’s a 20-minute job.
One thing worth saying up front: not every window unit even has a drain hole, and not every puddle is a clog. So before you go poking at anything, let’s make sure you’re chasing the right problem. I’ll walk you through how to tell what’s going on, how to clear a real clog, and how to keep it from coming back.
Snippet-Ready Definition
Unclogging a window AC drain line means clearing the blocked drain hole that lets condensation escape outside. Homeowners do it to stop water leaking inside the room, prevent musty odors and mold, and keep the unit draining and cooling properly.
Mission Statement
Dwellify Home exists to help homeowners and renters handle everyday home challenges with confidence. Guides like this one turn a frustrating problem — a leaking window AC — into a clear, doable fix, so you can maintain your space, save on service calls, and make practical decisions backed by real, hands-on know-how.
Key things this guide helps you do:
- Tell a real clog apart from a forward tilt, a dirty filter, or a frozen coil
- Clear the drain hole with simple tools, without removing the unit from the window
- Know which units aren’t designed to drain at all (and should never be drilled)
- Use the right cleaner — and avoid the one that corrodes your unit
- Set a simple maintenance habit so clogs don’t come back
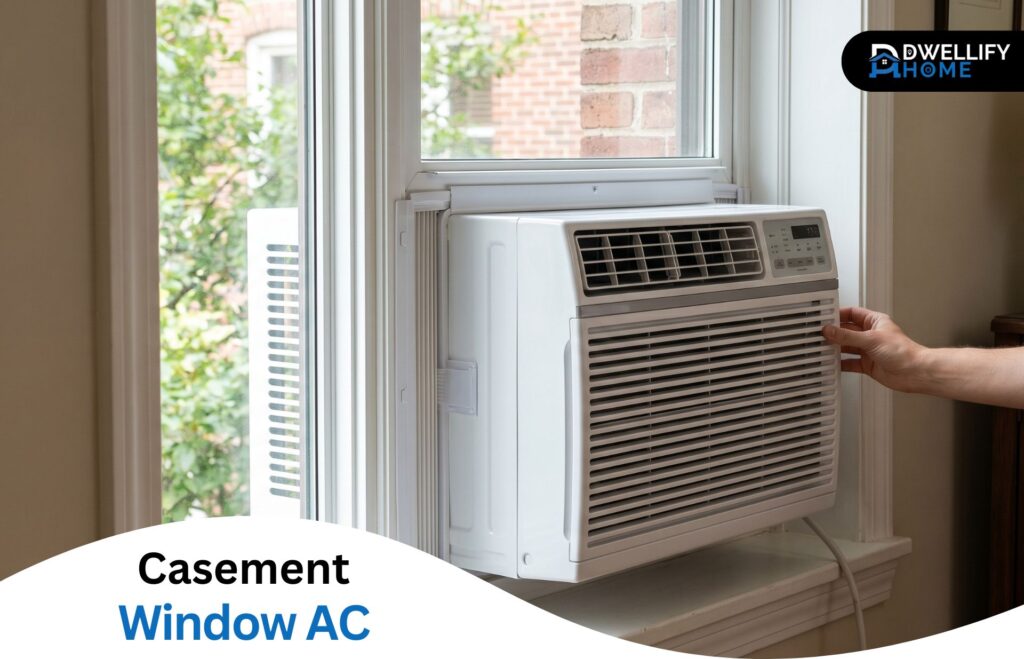
First, Confirm Your Window AC Is Supposed to Drain
Not all window air conditioners drain water out the back. Older units have a drain hole that lets condensation run outside. Many newer ones are sealed by design and reuse that water on purpose. If your unit drips outside on a humid day, that’s almost always normal, not a sign of a clog.
This trips people up constantly. Someone sees water and assumes something’s broken, when the unit is doing exactly what the engineers intended.
How Condensate Normally Moves Through a Window AC
When warm room air passes over the cold evaporator coil at the front of the unit, moisture condenses out of it, the same way a glass of iced tea sweats on a summer afternoon. That water drips down into a shallow base pan under the unit. From there, gravity carries it toward the back, where it either exits through a drain hole or gets picked up and dealt with by the fan.
That’s the whole system. When water shows up where it shouldn’t, something in that path is blocked, tilted wrong, or overwhelmed.
Slinger-Ring Units That Aren’t Designed to Drain (and Why You Shouldn’t Drill One)
A lot of modern units use what’s called a slinger ring. The rear fan has a ring around its edge that scoops water out of the base pan and flings it onto the hot condenser coil. The water evaporates off the coil, which actually helps cooling efficiency, which is why brands like GE and Friedrich build units this way to hit their Energy Star targets.
These units don’t have an open operating drain hole, and that’s intentional. Please don’t drill one. I’ve seen people put a screwdriver or a drill bit through a refrigerant line or the wiring harness trying to “fix” a unit that was never leaking in the first place. That turns a $0 non-problem into a dead air conditioner.
How to Tell Which Type You Own in 60 Seconds
Tip the unit slightly or look underneath the rear. If you see a small open hole or a rubber plug at a bottom corner, you likely have a drainable unit. If the bottom pan is sealed with no obvious port, it’s probably a slinger design. The owner’s manual settles it fast, and a quick search of your model number does the same. Once you know which type you have, you’ll know whether to keep going or stop here.
Signs Your Window AC Drain Line Is Actually Clogged
A genuine clog shows clear symptoms: water dripping or pooling inside the room rather than outside, a slow gurgle or standing water in the base pan, and often a musty smell as algae and biofilm build up in the trapped moisture. If the drain hole used to flow outside and now it doesn’t, a blockage is the most likely cause.
The key is matching the symptom to the cause instead of guessing. Here’s how to read what you’re seeing.
Water Leaking Inside the Room — Clog vs. Ice-Melt
This is the symptom that brings most people here, and it’s why so many search for why is my air conditioner leaking water from the bottom. A clog usually shows up as a steady, slow drip or a creeping puddle along the front edge while the unit runs.
A different pattern points somewhere else: if the leak suddenly gushes a larger amount of water shortly after you switch the unit off, that’s often melting ice from a frozen coil, not a drain clog. Same puddle, completely different fix. We’ll get to the frozen coil shortly.
Musty Smell, Gurgling, or Standing Water in the Drip Tray
When the drain path slows down, water lingers in the base pan instead of leaving. Stagnant water grows algae and a slimy biofilm, and that’s where the musty, sour smell comes from. You might also hear a faint gurgle as water struggles past a partial blockage.
If you pull the front cover and see standing water sitting in the tray hours after the unit has run, the drain isn’t keeping up. That’s your confirmation.
When Dripping Outside Is Normal, Not a Clog
Water dripping from the back of the unit, outside, is healthy operation. A window AC pulls a real amount of moisture out of the air, and on a hot, humid day a working unit can shed several gallons over 24 hours. That has to go somewhere.
So if the only “problem” is dripping onto the pavement or the AC sleeve outside, your unit is fine. Save your energy for an actual indoor leak.
Where Is the Window AC Drain Hole? (Location by Brand)
On most units, the drain hole sits on the rear underside, toward one of the bottom corners, where the base pan is lowest. It’s usually small, sometimes recessed, and easy to miss under a season’s worth of dust and leaves. The exact spot shifts a little by brand and by how old the unit is.
Frigidaire Window AC Drain Hole Location
On most Frigidaire window units, the drain point is at the rear of the base pan, near a bottom corner. Debris tends to collect right at that low spot, so it’s the first place to check and the first place to clean. A flashlight aimed up under the back of the unit usually finds it quickly.
LG, Midea, and Haier — Drain Holes and Hose Connectors
Some LG, Midea, and Haier models include a molded drain port or a spot to attach a window ac drain hose connector at the rear. If your unit has a threaded or barbed fitting back there, that’s a feature, not a defect, and it’s your cue that a drain kit can attach cleanly. More on that later.
GE and Friedrich — Slinger Designs With No Default Drain Hole
If you own a GE or Friedrich unit and can’t find a working drain hole, you probably aren’t missing it. Many of these are slinger-ring designs meant to evaporate condensate rather than drain it. Per GE’s own guidance, any plug you find is there for draining the unit before winter storage, not for everyday operation.
Older vs. Newer Units — Center, Side, and Rear-Corner Placements
Older window ACs often drained from near the center or a low point under the pan. Newer ones moved the opening to a side or rear corner, or did away with the open drain entirely in favor of the slinger system. So if your old unit drained one way and your new one behaves differently, nothing’s wrong, the design simply changed.
Tools You’ll Need (and Three to Leave in the Drawer)
You don’t need much, and a few common tools will actually make things worse. Keeping the wrong tools out of the job is half the battle.
The Four Tools That Actually Work
- Wet/dry shop vacuum — the workhorse. It pulls clogs out instead of pushing them deeper.
- Stiff wire or a straightened paperclip — to break up packed debris in the hole.
- Pipe cleaner or a small bottle brush — to scrub the inside of the drain channel.
- Distilled white vinegar — to dissolve algae and biofilm and sanitize the path.
That’s the core kit. Everything else is optional.
Optional Helpers
A flashlight makes finding the hole far easier. A torpedo level helps you check the unit’s tilt. A soft cloth handles the pooled water in the pan, and a squeeze bottle gives you control when you flush the line. Handy, but you can manage without them.
What to Skip — and Why
Leave the drain snake in the toolbox; it’s too aggressive for a thin plastic channel and can crack the pan. Skip canned compressed air for an indoor cleanup, since it tends to blast sludge back into the room. Don’t reach for the household vacuum either, because liquid and fine debris will ruin a dry vac. And keep the bleach away from the unit, which I’ll explain in detail below.
How to Unclog a Window AC Drain Line, Step by Step
Here’s the full process from start to finish. Work through it in order and you’ll clear most clogs in one pass.
Step 1 — Power Down and Unplug the Unit
Turn the AC off and pull the plug from the wall. Never work around the base pan or fan with the unit live. This is non-negotiable, and it takes five seconds.
Step 2 — Locate the Drain Hole on the Rear Underside
Find the drain opening at the rear underside, usually near a bottom corner. A flashlight helps. Clear away any leaves, dirt, or insect nests sitting right around the opening before you go in.
Step 3 — Clear Visible Debris With a Stiff Wire or Pipe Cleaner
Gently work a stiff wire or pipe cleaner into the hole to break up the packed gunk. Don’t force it hard or jab blindly; you’re loosening the blockage, not drilling. A few careful passes usually does it.
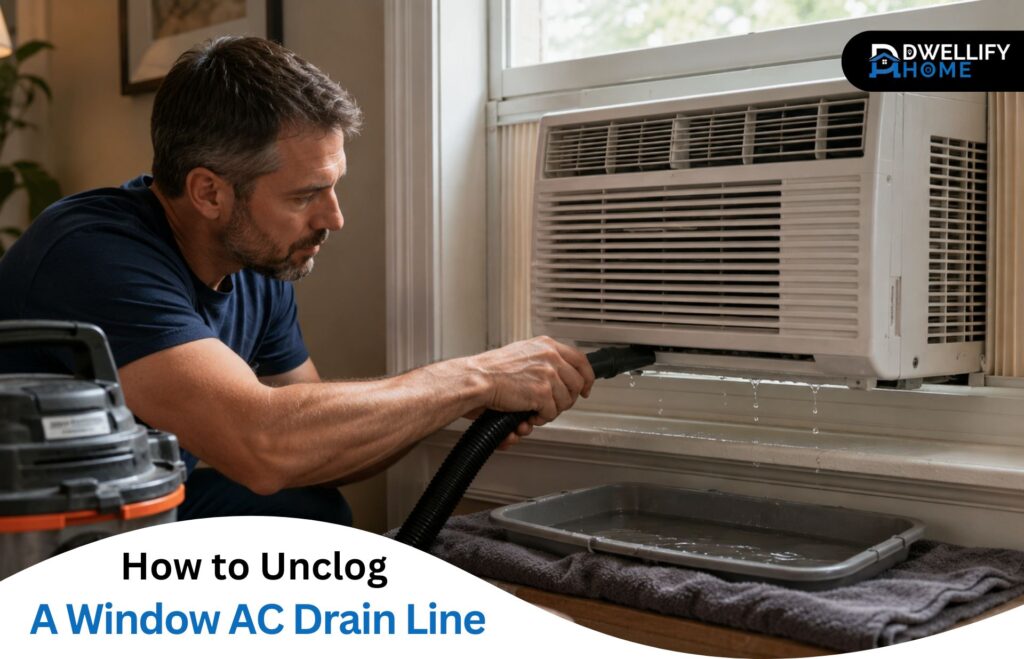
Step 4 — Suction the Clog Out With a Wet/Dry Shop Vacuum
This is the move that separates a real fix from a temporary one. Hold the shop vac hose over the exterior drain opening and seal the gap with a rag or a wrap of duct tape so the suction concentrates on the hole. Run it for a minute or two and you’ll pull the loosened sludge clean out instead of pushing it deeper.
Step 5 — Flush With a Vinegar-and-Warm-Water Solution
Mix distilled white vinegar with warm water, roughly one to one, and pour it slowly through the drain path from inside the pan. Let it sit about 30 minutes. The vinegar dissolves what’s left of the algae and leaves the channel sanitized.
Step 6 — Confirm the Fix by Pouring Water Through the Drain Pan
Pour a cup or two of clean water into the base pan and watch the rear drain. If it flows out freely, you’re done. If it backs up or trickles, repeat the wire-and-vacuum steps; something’s still lodged in there.
How to Unclog the Drain Line Without Removing the Unit
In most cases you can unclog a window ac drain line without removing it from the window. Work the shop vac and a rag seal at the exterior drain opening from outside, and run a wire or pipe cleaner from the base pan inside. Between suction from one end and gentle clearing from the other, the clog usually gives way in place.
Removal only becomes worth it when the pan is full of hardened sludge, the clog won’t budge from either end, or you suspect a cracked pan you need to see directly. For a routine seasonal clog, leave it mounted and save yourself the heavy lifting.
Why Your Unit Is Leaking — Telling a Clog From the Other Causes
A clog is only one of several reasons a window AC leaks inside. Before you decide you’ve fixed it, rule out the others, because the most common cause of an indoor leak often isn’t the drain at all. This is the heart of how to fix air conditioner leaking water inside: match the cause to the symptom.
A Dirty Air Filter and a Frozen Evaporator Coil
This is the one I’d check first. A clogged filter starves the coil of airflow, the coil drops below freezing, and ice builds up on it. When the unit cycles off, that ice melts all at once and overruns the pan, leaking inside. Pull the filter; if it’s gray and matted, clean or replace it and let any ice melt fully before running the unit again.
The Unit Is Tilted Forward Instead of Backward
If the AC leans even slightly toward the room, water flows in instead of out, no matter how clear the drain is. This is so common it gets its own section just below.
A Cracked, Rusted, or Warped Drain Pan
The base pan takes years of moisture, and eventually some crack, rust through, or warp. Water then escapes before it reaches the drain. A small crack can be sealed with waterproof epoxy putty; a pan that’s rusted through usually means the unit is near the end of its life.
Air Leaks Around the Cabinet and Window Frame
Warm, humid outdoor air sneaking in around a poorly sealed unit can condense on cold interior surfaces and mimic a leak. Foam side panels and weatherstripping that have gone flat are the usual culprits. Re-seal the gaps and the “leak” often disappears.
Low Refrigerant — When to Stop DIY and Call a Pro
If the coil keeps freezing even with a clean filter, and you notice a faint hissing or air that isn’t cooling like it should, the refrigerant charge may be low. That’s not a DIY fix. Refrigerant work needs a licensed tech, so stop here and make the call.
Fixing Improper Tilt — the Most Overlooked Cause
A window unit needs to sit with its back end slightly lower than its front so gravity carries condensate outside. Get this wrong and water pools toward the room. It’s quietly behind a huge share of “clog” complaints that aren’t clogs at all.
How Much Backward Slope Your Unit Actually Needs
Manufacturers don’t fully agree on the exact number, and that’s fine. LG suggests on the order of 10 to 15 millimeters of drop at the rear, Friedrich references around three-eighths of an inch, and EdgeStar has cited a larger figure in the inch-plus range. The practical takeaway is the same across all of them: a slight, deliberate tilt toward the outside. Always check your own model’s manual, but when in doubt, a small backward lean is the goal.
How to Check Tilt With a Torpedo Level in 30 Seconds
Set a torpedo level on top of the unit, front to back. You want the bubble shifted just slightly toward the rear, not centered. If it reads dead level or leans toward the room, the back end needs to come down a touch. Thirty seconds tells you what’s actually going on.
Shims, Brackets, and What to Do If You Can’t Tilt
If the sill is fighting you, a thin shim under the front interior edge usually corrects the angle. A proper support bracket does the same job more securely, especially on heavier units. If you’re working above the ground floor, treat this as a two-person task and don’t lean out over the sill; no drainage fix is worth a fall.
Drain Kits and Drain Hose Connectors — When You Actually Need One
A window air conditioner drain kit lets you route condensate exactly where you want it instead of letting it drip freely. You usually don’t need one. It earns its place in specific situations rather than as a default upgrade.
What a Window AC Drain Kit Is and How It Attaches
A drain kit is typically a connector or spout that fits the rear drain port, plus a length of hose that carries water away. On units built with a drain port, it clips or threads on in a few minutes. On sealed slinger units, there’s nothing to attach it to, which is another reason to know your unit type first.
When a Kit Is Worth Buying
Reach for a kit when free dripping causes a real problem: water staining the siding below, dripping onto a balcony or a neighbor’s window beneath you, or pooling somewhere you can’t have it. Directing the flow through a hose solves all of those cleanly.
Brand Picks and Universal Options
Friedrich offers dedicated drain kits such as the DC-2, DK, and PXDR10 for their units. Some LG models arrive with a drain-hose connection already built in. And universal aftermarket kits exist for units with a standard rear port, though fit varies, so match the kit to your drain opening before buying.
Vinegar vs. Bleach for AC Drain Lines — What HVAC Pros Actually Use
Use vinegar, not bleach. Distilled white vinegar dissolves algae and biofilm and sanitizes the line without harming the unit. Bleach corrodes aluminum coils, copper, and plastic components over time. Mix vinegar with warm water roughly one to one, let it sit about 30 minutes, then flush.
One hard safety rule: never mix bleach and vinegar. Combining them releases toxic chlorine gas. If you’ve already used one, rinse thoroughly with water before introducing the other, and frankly, just stick with vinegar and you’ll never have to think about it.
Preventing Future Window AC Drain Clogs
Most clogs are predictable, and a little routine keeps them from ever forming. None of this takes long.
Clean the Filter Every Two to Four Weeks in Peak Season
The filter is your first line of defense. A clean filter keeps dust out of the pan and keeps the coil from freezing. Pull it, rinse it, let it dry, and slide it back. Every two to four weeks during heavy use is a reasonable rhythm.
Flush the Drain Line at the Start of Every Cooling Season
Before the first hot stretch, run a vinegar-and-water flush through the drain path. Clearing it once a year, before buildup hardens, prevents the mid-summer backup that sends people scrambling.
Deep-Clean the Coils and Pan Once a Year
Once a season, give the coils and base pan a proper cleaning. Gently brush dust off the coils and wipe out any sediment in the pan. Clean coils drain better, cool better, and last longer.
Catch Early Symptoms Before They Become Indoor Floods
A faint musty smell or a slow gurgle is the unit telling you the drain is starting to load up. Act on those early signals with a quick flush and you’ll almost never deal with water on the floor.
When to Stop DIY and Call a Professional
Some problems are past a flush and a wire. Call a pro if the coil keeps freezing after you’ve cleaned the filter, if you hear hissing or smell something chemical near the unit, or if the pan is cracked or rusted through. A professional drain-line cleaning typically runs in the range of roughly $75 to $250 depending on your area and the unit.
If you do bring someone in, it’s reasonable to get more than one quote for anything beyond a simple cleaning. Refrigerant and electrical issues in particular are worth paying a licensed tech to handle correctly.
Frequently Asked Questions
Why Is My Window AC Running but No Water Is Dripping Outside?
Often that’s normal, especially on a slinger-ring unit that evaporates condensate by design. But if it’s a drainable model and indoor humidity is high, no outside drip can mean the drain is clogged or the unit is tilted forward. Check the drain path and the tilt to be sure.
Can I Drill My Own Drain Hole in a Window AC?
No, don’t do it. The inside of a window AC packs refrigerant lines, wiring, and the coil close together, and a drill bit can puncture any of them. On slinger-ring units the lack of a drain hole is intentional, and drilling one defeats the design and can total the unit.
Should I Remove the Drain Plug on My Window AC?
Generally, leave it in during normal use. On many units the plug keeps water in the pan so the slinger ring can use it for cooling. The plug is usually meant for draining the unit before storage. Check your manual, since guidance varies by brand and model.
Can I Pour Hot Water Down a Window AC Drain Line?
Warm water is fine and helps loosen buildup, especially mixed with vinegar. Avoid boiling water, which can soften or warp thin plastic drain components. Warm, not scalding, is the safe call.
How Much Condensate Is Normal — Gallons Per Day?
Quite a bit. On a hot, humid day a working window unit can pull several gallons of moisture from the air over 24 hours. Steady dripping from the back outside is a sign the unit is removing humidity properly, not a malfunction.
How Often Should I Clean My Window AC Drain Line?
Flush the drain line at least once a year, before the cooling season starts. If you run the unit hard, live somewhere humid, or have pets adding dust to the air, a mid-season flush is a smart addition. Pair it with regular filter cleaning and clogs rarely get a foothold.
How can I tell if my AC drain pipe is clogged?
A clogged drain shows clear signs: water dripping or pooling inside the room instead of outside, standing water in the base pan hours after running, a slow gurgling sound, and a musty smell from trapped moisture. If the drain used to flow outside and now doesn’t, suspect a blockage.
Can I snake a clogged AC drain line?
It’s better not to on a window unit. A drain snake is too aggressive for the thin plastic channel and can crack the base pan. A stiff wire or pipe cleaner to loosen debris, followed by a wet/dry shop vacuum to pull it out, clears most clogs safely without that risk.
Do all window AC units have a drain hole?
No. Many newer units use a slinger-ring design that flings condensate onto the condenser coil to evaporate it, improving efficiency, so they have no open operating drain hole by design. Brands like GE and Friedrich often build units this way. Check your manual before assuming a missing hole is a fault.
What can I pour down an AC drain line to unclog it?
Use distilled white vinegar mixed with warm water, roughly one to one. It dissolves algae and biofilm and sanitizes the line without harming the unit. Let it sit about 30 minutes, then flush. Avoid bleach, which corrodes metal and plastic parts, and never mix the two.
Can I unclog the drain line without removing the unit from the window?
Usually, yes. Seal a wet/dry shop vacuum over the exterior drain opening to suction the clog out, and work a wire or pipe cleaner from the base pan inside. Removal only becomes necessary if the pan is packed with hardened sludge or you suspect a cracked pan.
Wrapping Up
Here’s the part worth remembering: most of the time, learning how to unclog a window AC drain line is the easy bit, and the real lesson is that a lot of “clogs” turn out to be a forward tilt or a filthy filter instead. Check those two things first, and when you do hit a true blockage, the shop vac at the exterior drain hole is the fastest honest fix there is. If you take one habit away from all this, make it the filter. Keep it clean, and you’ll spend far more summers enjoying the cool air than crouched behind the unit with a wire.
Disclaimer
This content is for general informational purposes only. Individual units, models, and situations vary, so always check your manufacturer’s manual and use your own judgment. When a problem involves refrigerant, electrical components, or anything beyond a basic cleaning, consult a qualified HVAC professional.