You walk into the appliance aisle, grab a window AC that fits your budget, bring it home, and then realize it has nowhere to sit in your window. That crank-out window opens sideways, not up and down, and the boxy unit you bought needs a flat sill and a sash to press down on top of it. Neither exists here. The good news is that an air conditioner for a casement window is a solved problem. You really only have two reliable paths: a tall, narrow unit built specifically for these openings, or a portable AC vented through a custom panel that fits the window. Everything below helps you pick between them and get it installed right.
Snippet-Ready Definition
An air conditioner for a casement window is either a tall, narrow vertical unit built for crank-out openings or a portable AC vented through a custom panel. Standard window units don’t fit, so these solve cooling for side-hinged windows that open outward.
Mission Statement
Dwellify Home helps homeowners, renters, and property enthusiasts make practical, well-informed decisions about their living spaces. With this guide, our aim is to take the guesswork out of cooling a casement-window room so you can choose the right air conditioner with confidence and set it up safely.
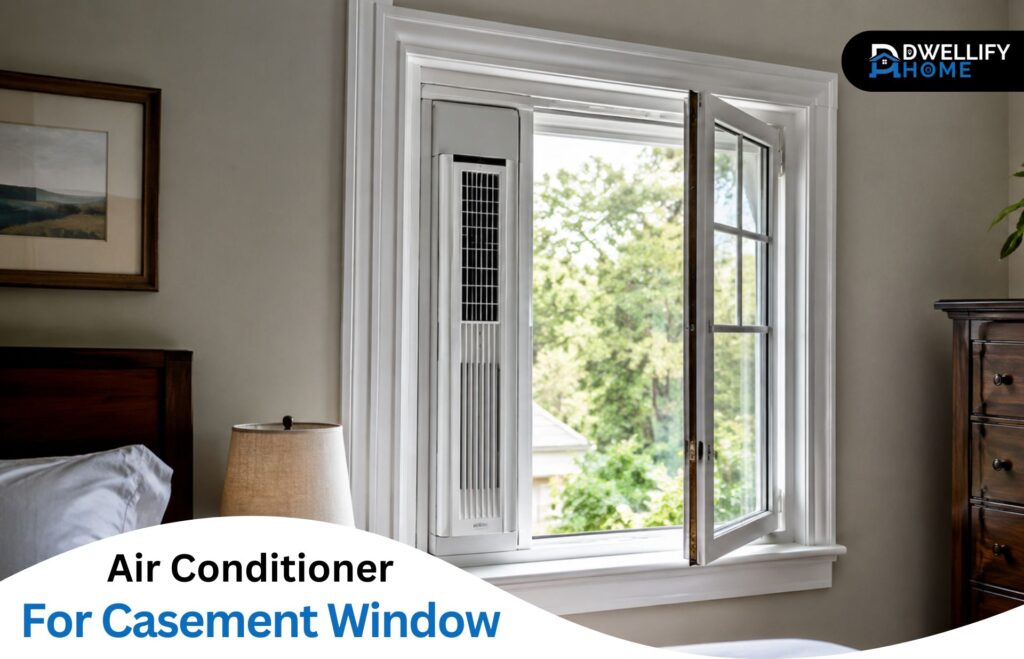
What Is a Casement Window (and Why It Complicates Cooling)?
A casement window is hinged on one side and swings outward when you turn a crank handle, like a small door. That outward swing and the tall, narrow shape are exactly what make standard cooling gear useless here, because nothing in the opening holds a normal unit in place.
It helps to know what you’re not dealing with. A double-hung window slides up and down, a slider moves side to side along a track, an awning hinges at the top and tilts out, and a hopper hinges at the bottom. Casement and awning windows share the crank-and-swing mechanism, which is why they cause the same headaches. If your window opens by cranking outward and is taller than it is wide, you’ve got the situation this guide is built for.
Quick comparison — your two real options
| Option | Best for | Trade-off |
| Vertical casement AC (up to 10,000 BTU) | Owners, rooms ≤450 sq ft, clear floor space | Heavy, capped cooling power, more involved install |
| Portable AC + custom vent panel | Renters, larger rooms, narrow openings | Uses floor space, slightly noisier, you solve venting |
Key things to check before buying
- Measure the opening, not the glass — current units need about 15.5″ minimum width
- Size by room: roughly 20 BTU per square foot, with casement units topping out near 10,000 BTU
- Confirm voltage (most run on standard 115V)
- Look for an included mounting kit, side filler panels, and a washable filter
- For a portable, plan the venting (fabric kit, acrylic or polycarbonate insert, or DIY panel)
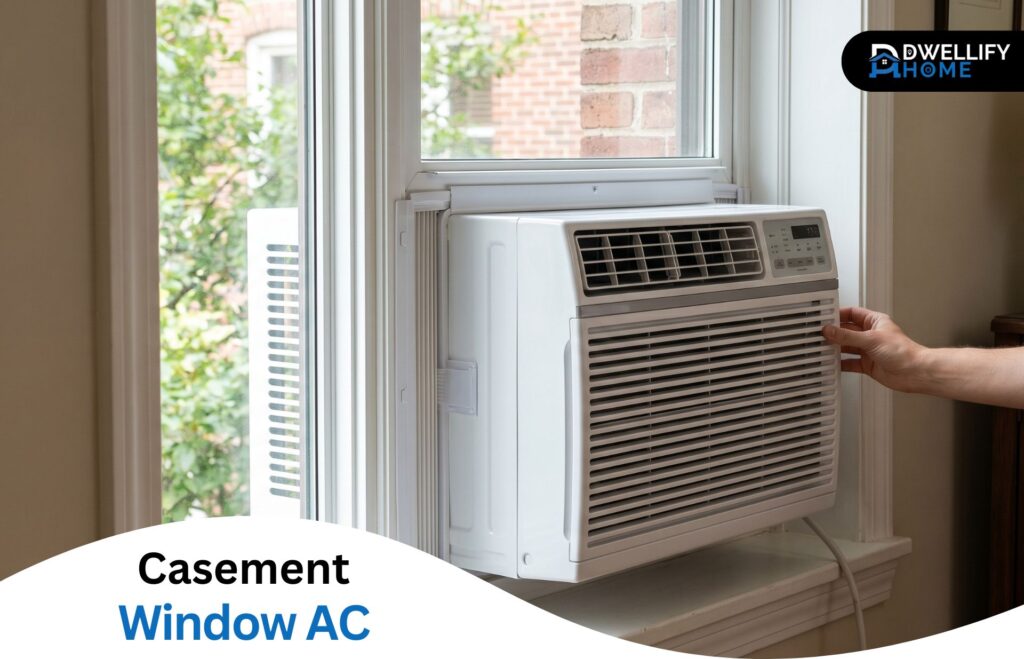
Why Standard Window Air Conditioners Don’t Fit Casement Windows
A standard window AC is wider than it is tall and is designed to rest on a flat sill while you slide the upper sash down to pin it in place. A casement window has no flat sill to set the unit on and no sash that drops down to lock it, so there’s physically nothing to hold the AC. The opening is also too narrow for most units.
I’ve seen people try to wedge one in anyway, and it goes badly. The accordion side panels that normally fill the gaps are made to expand horizontally; in a tall, narrow opening they leave huge gaps you’d have to stuff with foam.
Worse, the unit isn’t secured. A standard AC in a casement opening can be pushed inward from outside with very little effort, and it can tip out if it’s not braced. You also can’t crank the window shut against it. So you end up with a unit that’s unsafe, leaky, and impossible to seal properly. It’s not worth the risk.
Casement, Slider, Vertical — Untangling the Confusing Labels
Here’s something that trips up almost everyone shopping for this. You’ll see units labeled “casement,” “slider,” and “vertical,” and assume they’re three different products. Most of the time they’re the same thing: a tall, narrow AC built to stand upright in an opening that’s taller than it is wide.
Manufacturers use these terms loosely because the same unit works in a casement window, a horizontal slider, and some tall narrow openings. So when you search, treat “slider/casement,” “vertical window AC,” and “casement window air conditioner” as overlapping categories, not separate ones. The spec that actually matters is the unit’s footprint, not the word on the box. Read the minimum and maximum window dimensions, and ignore whether the listing leans on one label or another.
Your Two Real Options for Cooling a Casement-Window Room
Once you accept that a standard unit is out, the decision gets simple. You’re choosing between a dedicated vertical casement AC and a portable AC vented through a custom window panel.
A vertical casement unit mounts in the window itself, frees up your floor space, and tends to cool efficiently because there’s no long hose losing heat. The trade-offs are weight, a more involved install, and a hard ceiling on cooling power.
A portable AC sits on the floor and pushes hot air out through a hose. It’s easier to move, easier for renters to reverse, and scales to larger rooms, but it eats floor space and you have to solve the venting yourself. As a rough rule, owners with a small-to-medium room lean toward the window unit, while renters and anyone with a big room lean toward the portable. The rest of this guide expands both paths.
How to Choose a Casement Window Air Conditioner
Four things decide whether a unit will actually work for you: the right cooling capacity for your room, a window opening that fits the unit’s dimensions, the electrical and efficiency specs, and a few features that genuinely matter. Get the first two right and you’ve avoided the mistakes that send most units back to the store.
Get the BTU Right (and Why 10,000 BTU Is the Practical Ceiling)
Start with about 20 BTU per square foot of room. A 300-square-foot room lands around 6,000 BTU as a baseline. Then adjust: knock off roughly 10 percent for a heavily shaded room, add about 10 percent for a sun-soaked one, add around 600 BTU for each person beyond two who’s regularly in the room, and add about 4,000 BTU if it’s a kitchen.
Here’s the part nobody tells you up front. Casement units max out around 8,000 to 10,000 BTU, which covers roughly 450 square feet. The narrow chassis simply can’t house a bigger compressor. If your room needs more than that, a window unit isn’t the answer and you should plan on a portable.
Don’t oversize either. A unit that’s too big cools the air fast, shuts off, and never runs long enough to pull humidity out. You end up with a room that’s cold and clammy. Matching the BTU to the room beats buying the biggest unit that fits.
Measure Your Window Opening Correctly
Before you buy anything, measure the actual opening, not the glass. Across current casement units, the minimum width runs around 15.5 inches. If your opening is narrower than that, no standard casement AC will fit, full stop. A 14-inch opening rules out every unit I’m aware of.
Measure the clear width between the frame channels and the available height with the window cranked fully open. Most units want a minimum height in the low 20-inch range and can handle quite a bit more with their filler panels. Write those numbers down and check them against each unit’s spec sheet before you order.
Efficiency, Voltage, and Features Worth Paying For
Most casement units run on a standard 115-volt outlet, which keeps installation simple. Watch for the occasional model needing 230 volts, since that means a dedicated circuit.
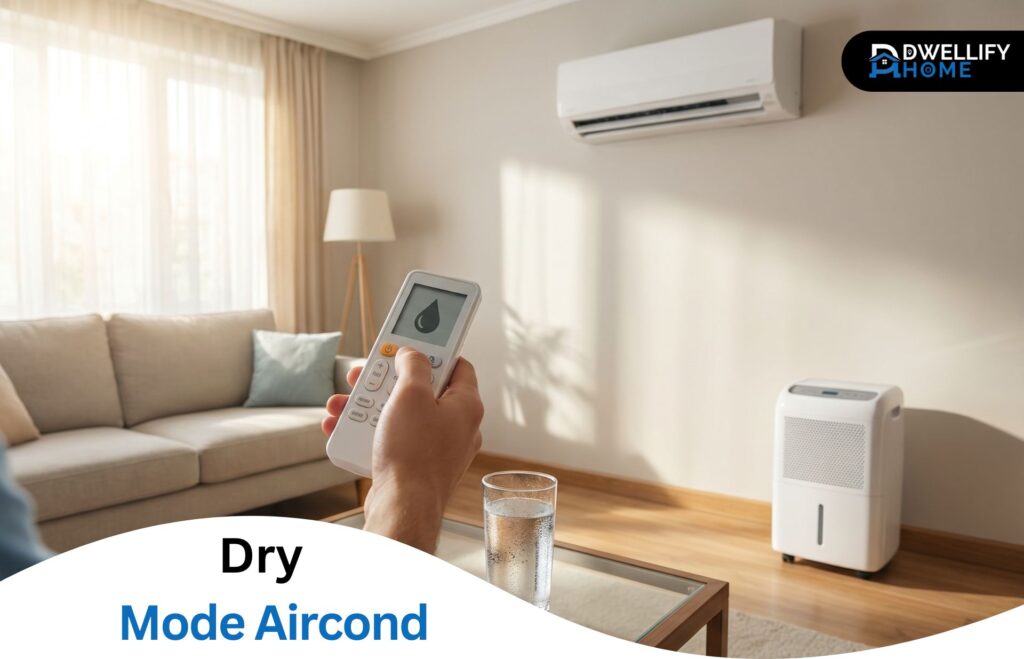
On efficiency, be realistic. Casement and slider units tend to land around 9.5 to 10.5 CEER, which is generally below the ENERGY STAR threshold. That’s the nature of the form factor, not a defect, so don’t expect a casement unit to be the most efficient AC in the house. As for features, the ones that earn their keep are an included mounting kit with side filler panels, a remote and timer, a washable filter, and a dehumidify mode. Skip paying extra for the rest.
Current Casement Window AC Models Compared
A handful of units are reliably available right now. Specs vary by listing, so confirm the exact dimensions against your window before buying. Here’s how the main current options stack up:
| Model | BTU | Coverage | Voltage | Notes |
| Keystone KSTSW08B | 8,000 | ~350 sq ft | 115V | Good fit for a bedroom; minimum width around 15.5″ |
| Keystone KSTSW10B | 10,000 | ~450 sq ft | 115V | Around 10.4 CEER; common, widely stocked |
| Perfect Aire 4PASC10000 | 10,000 | ~400–450 sq ft | 115V | Handles a wide height range with filler panels |
| Pelonis PAC10C1BWT | 10,000 | ~450 sq ft | 115V | Sold through some big-box retailers |
| Frigidaire FHSC102WB1 | 10,000 | mid-size room | 115V | Current Frigidaire slider/casement unit; newer R32 refrigerant |
For most bedrooms, an 8,000 BTU unit like the Keystone KSTSW08B is plenty. For a living room up to around 450 square feet, a 10,000 BTU model is the sensible top end. Notice there’s no 12,000 BTU option on this list, and that’s not an oversight, which the FAQ explains.
When a Portable AC Is the Smarter Choice
Reach for a portable air conditioner for a casement window in three situations: your room is bigger than roughly 450 to 500 square feet, your opening is too narrow for any vertical unit, or you rent and want something you can pull out cleanly when you leave.
Portables also make sense if you’d rather not hang 70-plus pounds of metal in a window over a second-story drop. They’re heavier on floor space and a touch noisier since the compressor sits in the room, but they sidestep every mounting and security worry a window unit brings. The catch is venting, which is the one part that takes thought with a casement window.
The Four Ways to Vent a Portable AC Through a Casement Window
The hose has to exhaust hot air outside, and the flat plastic slider kit in the box won’t seal a crank-out window. You’ve got four real ways to bridge that gap: a fabric zipper seal kit, a custom acrylic insert, a custom polycarbonate insert, or a DIY rigid panel. They range from cheap and reversible to clean and permanent.
Fabric and Vinyl Zipper Seal Kits (Cheapest, Renter-Friendly)
These are flexible fabric panels, often sold by brands like HOOMEE or IKSTAR, that attach to the window frame with hook-and-loop tape and zip around the exhaust hose. They run roughly $15 to $35, install in minutes, and peel off without a trace, which makes them the go-to for renters.
The standard kit in the AC box won’t work because it’s a rigid bar made to brace inside a sliding sash, not span a crank opening. A fabric kit is purpose-made for the casement shape. The trade-off is that it’s soft, so it looks less finished and seals slightly less tightly than a rigid panel.
Custom Acrylic Inserts (Clean, Permanent-Feeling)
A custom acrylic insert is a clear panel cut to your exact opening, with a port for the hose. Companies like Martinson Manufacturing CNC-cut these to slot into the screen channel, so you pop out the screen, push the panel in, and you’re done in five to ten minutes with no drilling.
Expect to pay around $245 and up. You’re paying for a clean look, a clear sightline that still lets light in, and a tight, rigid seal. For an owner, or a renter who wants something that looks built-in and keeps the screen for reinstalling later, it’s a solid choice.
Custom Polycarbonate Inserts (Shatter-Resistant Alternative)
Polycarbonate inserts, such as those from TAP Plastics, do the same job as acrylic but in a tougher material that resists cracking. You can usually pick the vent-hole size to match your hose and choose a tint or color if you want more privacy.
This is the option to consider for a ground-floor window where you’d like a little more durability and security, or anywhere you’d rather not have a fully clear panel on display.
DIY Rigid Panels (Corrugated Plastic, Foam Board, Plywood)
If budget is the priority, you can cut your own panel. Corrugated plastic sheet is the sweet spot, light, weatherproof, and usually under $20, and you cut a hole for the hose adapter. Foam board and plywood are cheaper still.
The honest trade-off is looks and light. A rigid DIY panel works fine, but plywood and foam board block your view and your daylight completely, and none of these will look as tidy as a cut-to-fit insert. For a short cooling season or a spare room, that’s often a fair compromise.
How to Install a Vertical Casement Window AC
Installing a casement unit is straightforward if you respect the weight and seal it in layers. Work with a helper, since these units are awkward to hold upright while you fasten them.
- Remove the window screen. On some windows you’ll also need to remove or retract the crank operator so the unit sits flush; check whether yours interferes.
- Set the unit upright in the opening and fasten it with the included L-brackets. Get it plumb before tightening anything.
- For a heavy unit or an upper-floor window, add a support bracket. A vertical unit hanging in an outward-opening frame puts real load on the sash, and a bracket takes the strain off it.
- Slide in the side filler panels to close the gaps along the sides.
- Seal in three places: channel-seal foam strips down the cabinet sides, the filler panels themselves, and a foam seal stuffed between the glass and the head of the frame.
- Set a slight outward tilt, about a quarter to half an inch, so condensate drains outside instead of pooling on your floor.
- Plug into an appropriately rated outlet, and avoid extension cords.
How to Set Up and Vent a Portable AC in a Casement Window
This is the quicker install of the two, since the AC itself just sits on the floor. The work is all in the window panel.
- Pop out the screen and set it aside to reinstall later.
- Fit your chosen panel, fabric kit, acrylic, polycarbonate, or DIY, into the screen channel or frame, following the kit’s instructions.
- Connect the exhaust hose to the unit and to the panel’s adapter.
- Keep the hose as short and straight as you can. Portable AC efficiency drops off fast when the hose is stretched long or left kinked, because the hot air it’s carrying radiates back into the room. Run it the most direct route to the window.
- Seal any leftover gaps around the panel so you’re not pulling hot outside air back in.
Keeping a Casement AC Secure and Sealed
A window AC can be pushed inward from outside, so security matters, especially on a ground floor. With a casement unit, the goal is to stop the sash from being cranked open and to keep the unit from being shoved in.
A heavy-duty support bracket does double duty here, holding the weight and making the unit harder to dislodge. Pinning or locking the sash so it can’t crank open from outside closes the obvious entry point. On sealing, don’t skimp: a poorly sealed unit can leak air through gaps that add up to the equivalent of a several-square-inch hole in your wall, which wastes the cooling you’re paying for. Foam channel seal and weatherstrip around the side panels handle both the draft and the condensation that otherwise forms on cold metal edges.
What to Do With Your Unit in Winter
When the season ends, you’ve got two sensible moves. Pull the unit out and store it, which fully closes the window and stops heat loss, or leave it in and cover it with a properly fitted insulated cover to cut the draft.
If you ran a portable AC with a panel in the window, you can pull the panel and reinstall your screen, or leave the panel and slip a piece of rigid foam insulation board into the opening to block heat loss through the winter. Leaving an uncovered unit or open panel in place all winter just bleeds heat out of the room.
Common Problems and How to Fix Them
Most casement AC complaints trace back to a handful of causes. Water dripping inside usually means the unit isn’t tilted outward enough, so condensate runs the wrong way; nudge the back down slightly. Drafts almost always come from gaps around the filler panels, fixed with more foam and weatherstrip.
Bugs getting in is a common surprise once the screen is out, so seal the panel edges fully. Weak cooling has a few suspects: a unit that’s oversized and short-cycling, one that’s undersized for the room, or a portable with a hose that’s too long or kinked. Match capacity to the room and keep that hose short and straight, and most cooling problems disappear.
A Shrinking Category: Discontinued Models and What’s Safe to Buy
Worth knowing before you shop: the casement AC category is getting smaller. Several once-common units, including the Midea MAW10C1AWT and older Frigidaire FFRS-series models, have been discontinued, which is why you’ll hit so many dead listings and out-of-stock pages.
A couple of useful notes. Pelonis and Midea casement units come from the same parent company, so you’ll see overlapping designs and shared parts. And newer units have shifted to R32 refrigerant from the older R410A, which is a point in their favor environmentally if you’re comparing models. For current safe bets, the Keystone KSTSW08B and KSTSW10B, the Perfect Aire 4PASC10000, the Pelonis PAC10C1BWT, and Frigidaire’s current FHSC line are the units actually on shelves.
Frequently Asked Questions
Can I put a regular window AC in a casement window?
No. A standard window unit needs a flat sill and a sash that drops down to hold it, neither of which a casement window has. Forced in, it can’t be secured, leaves large gaps, and can be pushed in from outside. Use a vertical casement unit or a portable AC instead.
Does a 12,000 BTU casement window air conditioner exist?
Not as a current, widely available unit. The narrow casement chassis caps out around 10,000 BTU. The only notable 12,000 BTU slider/casement model, an older Frigidaire, has been discontinued. If you need more than 10,000 BTU, plan on a portable AC vented through a custom panel.
Do I need to remove the window crank?
Sometimes. On certain windows the crank operator sits where the unit needs to seat, so you’ll remove or retract it for a flush fit. On others it clears fine. Check yours before installing, since it varies by window and unit.
Will a portable AC seal kit work with an outward-opening casement window?
A purpose-made fabric or vinyl zipper kit will, since it’s designed to seal a crank-out opening. The rigid plastic slider kit included with most portable ACs will not, because it’s built to brace inside a sliding sash, not span a casement window.
Can I leave the vent insert in year-round?
You can leave a rigid acrylic or polycarbonate insert in place, but slip a piece of foam board into the hose port over winter to block heat loss. Fabric kits are better removed seasonally so you can crank the window shut and reinstall the screen.
What’s the difference between a casement and a slider AC?
Usually none. Manufacturers label the same tall, narrow unit “casement,” “slider,” or “vertical” interchangeably. Focus on the listed window dimensions rather than the label to confirm it fits your opening.
Will any unit fit a 14-inch-wide opening?
No. Current casement units need roughly 15.5 inches of width at minimum. A 14-inch opening is too narrow for any of them, so a portable AC with a custom vent panel is your route.
Can I use one of these in an awning or hopper window?
A portable AC with a custom-cut panel can work in awning and hopper windows since you’re fitting the panel to the opening. A vertical casement unit generally won’t, because those windows don’t give it a stable upright seat.
Choosing the Right Air Conditioner for Your Casement Window
Picking an air conditioner for a casement window really comes down to one fork. If your room is 450 square feet or less and you want the floor kept clear, a vertical casement unit up to 10,000 BTU is the cleaner answer. If the room is larger, the opening is too narrow, or you rent and want something reversible, go with a portable AC and a custom vent panel. Match the unit to your room and your living situation, measure twice before you buy, and seal it well, and you’ll cool that room without a fight.
Disclaimer
This content is for general informational purposes only. Product availability, specifications, and prices change over time, and individual rooms, windows, and situations vary. Always confirm a unit’s dimensions and requirements against your own window before purchasing.